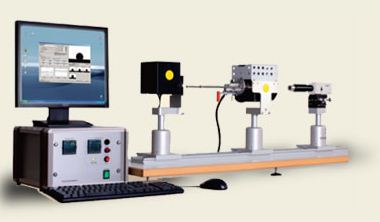
The Heating Microscope with Automatic Image Analyzer is used to study the behaviour of samples in high temperatures up to 1700°C and to get their characteristic temperatures viz. Sintering, Deformation, Sphere, Hemisphere, and Flow temperatures automatically through the software. It gives a complete view of how different samples deform differently with increasing temperature, and how the contact angle, corner angle, shape, area, height, width etc. of the specimens change accordingly. It also shows the thermal expansion behaviour, corrosion, adhesion, and many more important properties of the samples very accurately.
Application :
To observe the high-temperature deformation of a wide range of materials and to determine their characteristic temperatures and also for the measurement of Ash Fusibility.
It has applications in :
- Measurement of Ash Fusibility.
- Assessment of the
- Sintering behaviour of Ceramic Materials
- Wetting behaviour of Refractory Materials
- Blistering behaviour of some special Ash or Raw Materials
- Even Direction Dependent Shrinkage Behavior of a wide range of materials
- And also in the field of developing Glass, Glazes or Enamels.
The method of measurement is based on Thermo Optical Analysis.
The Image Analysis and Software automatically determines the Characteristic Temperatures viz.
- Sintering
- Deformation
- Sphere
- Hemisphere and
- Flow Temperatures - according to some fixed algorithms.
Based on the quantitative measurement of the sample’s height and width, Dilatometric Curves can be viewed on-screen or printed out. These curves can be used to derive information on the Sintering, Blistering or even Direction Dependent Shrinkage Behavior of the materials. The Wetting Behavior of melts on various substrates can also be characterized by the measurement of the contact angles.
Some important information about the Heating Microscope
- Sample Thermocouple is located directly below the specimen and well protected within the specimen holder.
- There is Ceramic Fiber Insulation over the Tube Furnace.
- Heating Element of the Furnace is made of Molybdenum Disilicide (MoSi₂).
- Rectangular Alumina Substrates are used as Specimen Carriers.
- Furnace Tube is made of Dense-Sintered Aluminum Oxide (Al₂O₃).
- Two types of Furnaces are there: M16 andM17. These are different from each other due to their Maximum Furnace Temperature, Maximum Sample Temperature and Maximum Heating Rate.
- Reference Materials used for temperature calibration: Gold and Palladium.
Some important information about the Software part
Automatic determination of characteristic temperatures based on automatic contour recognition and evaluation of Silhouettes of a test object.It displays results as Dilatometric Curves or as a graph comparing several test runs.
So, whatever the material is and whenever the shape and dimensions of the specimen get changed with temperature and time, the Heating Microscope helps to obtain valuable information about it with utmost accuracy and unparalleled repeatability.
Request Quote
